Install Java on macOS
Updated at: Jul 3, 2024
This guide will guide you through the process of downloading and installing Java on macOS.
-
Visit the Java website and download the installer
To install Java, you first need to download the installer program from Oracle.
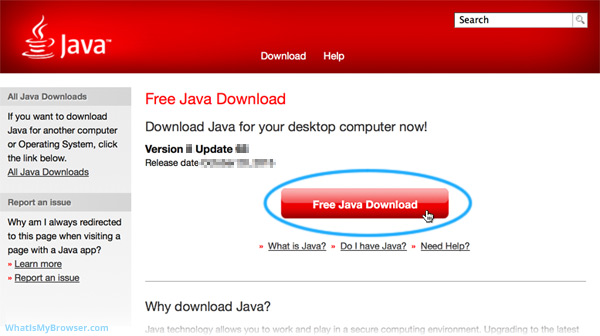
Visit the "Download Java" page: https://java.com/download
Click the "Free Java Download" button.
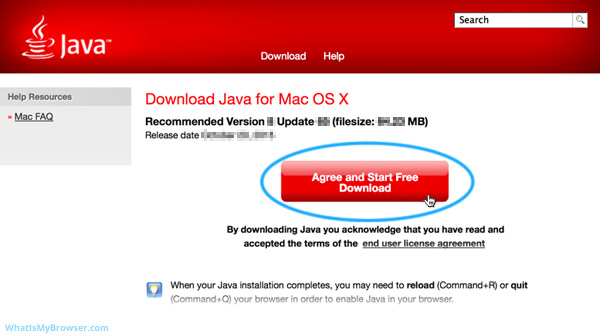
You are then prompted to read and agree with the end user license agreement.
Depending on which web browser you are using to download Java and depending on its configuration, you may be prompted to either Download or Save the installer file.
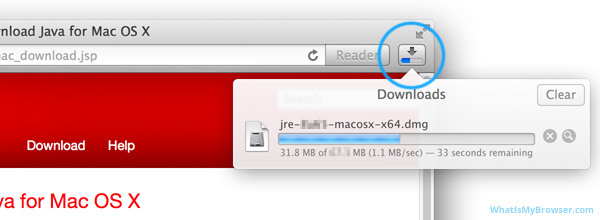
If you are using Safari, the Java installer will automatically download to your Downloads folder. You can see its progress in the little "Downloads" icon in the top right. If you click it, it will show more detail.
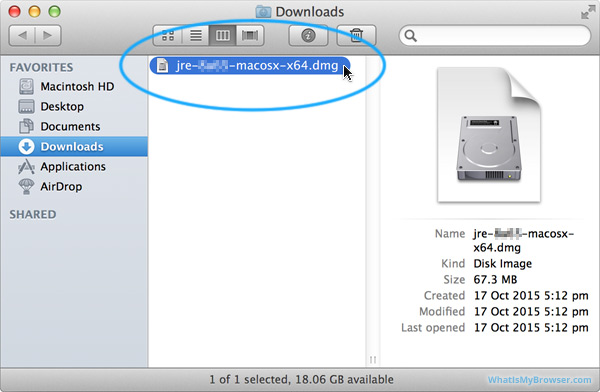
If you are using Safari, once it has finished downloading you can click the little magnifiying class to "Show in Finder", which will then open the "Downloads" folder.

If you are using a different browser, you'll need to go to your "Downloads" folder using Finder.
-
Unpack and run the installer
Depending on which web browser you're using and your browser's configuration, your browser may automatically open the ".dmg" file which was just downloaded.
If it doesn't automatically open, once the download has completed, open your Downloads folder and find the "dmg" installer file.
Ensure that it is actually the same file you just downloaded from the Java website. Double click it to mount/open the installer container.
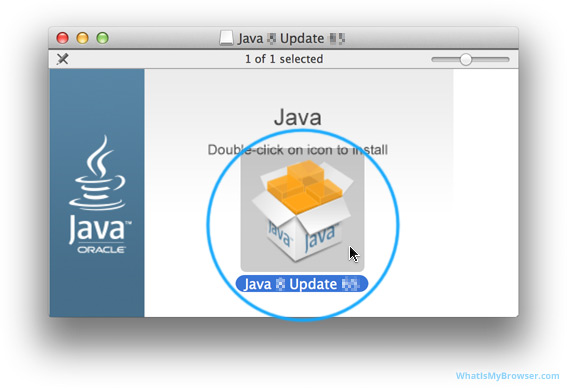
The "dmg" container file you have downloaded contains the installer program. Double click it to run the installer.
You will be prompted if you really want to run the "Java X Update XX" program ...of course, it will have the actual version numbers there!
Read the prompt carefully to ensure that you are actually running the file you just downloaded. Check the file name and the date and time it was downloaded. When you are ready, click the "Open" button.

The installer program will need to put system files on your computer and by default it will not have permission to do this. To grant the installer program permission to modify and create system files you need to enter your username and password and then click the "OK" button.

-
Install Java
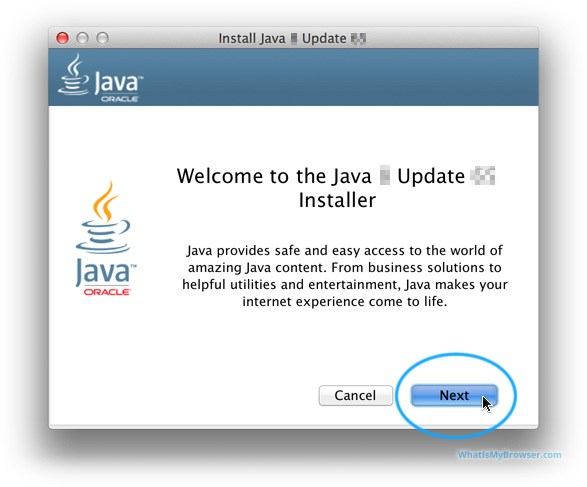
You are now running the Java installer. Click the "Next" button to proceed.
The installer will then download and install the latest version of Java.

When the installation is finished, you are told that after you click the "Close" button, your browser will open so that you can verify Java is working.

-
Verify Java
The Java installer will open your default web browser and prompt you to verify your Java installation.
If you try to use any modern browser to verify your Java installation, you will get an error similar to this:

You will need to use an older version of a web browser which still supports the NPAPI system that Java uses. Chrome dropped support for it in September 2015, so it will have to be quite an old version.
None but the most ancient websites use Java these days and the NPAPI system that Java uses has often caused security risks on websites. You can read more about it in the official statements from Google and Oracle:
If you're using a browser that still supports Java, you will typically be prompted to allow the Java plugin to run. The following screenshot is taken from Internet Explorer.
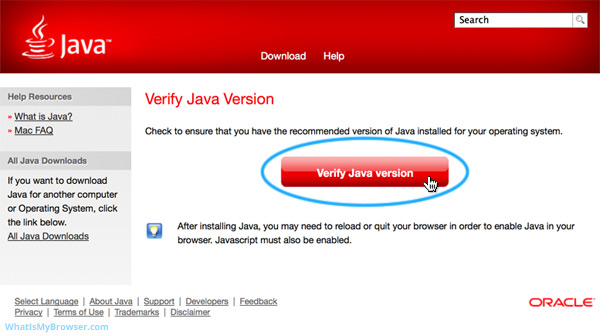
You will see the "Verify Java version" button. Click it to verify your installation of Java.
Typically, you will be prompted to allow the Java plugin to run. The following screenshot is taken from Safari.

You are then prompted one more time by Java itself if you want to run this application. Pay attention to the warning it gives about granting unrestricted access to your computer. You should always be very careful when you run Java applications; make sure you only run applications from companies you trust.
In particular, always look at the Publisher name.
In this instance, we are talking about a Java application made by the company who creates Java ("Oracle America, Inc."); so it's probably pretty safe to run. When you are ready, click the "Run" button on the warning.

After you allow this Java app to run, it will verify that you have Java installed and (provided that everything during the installation worked) show you a message to this effect.

The default configuration for Java is to automatically check for updates and install them when they are available. This helps to keep Java patched and your computer safer.
Looking for guides to install Java on other operating systems?
Here are some guides for other platforms like Microsoft Windows.